The next method for impregnation is the so-called charge with magic volts, using, for this purpose, the electromagnetic fluid. The volt is charged, after its creation, with an electromagnetic fluid. The qualities of the intelligence in question are concentrated into the centre of the volt by help of imagination, imperturbable confidence and sure power, and are so condensed by repeated action that the metal of the talisman absorbs the volt. When the process of charging by volts is repeated, the magician has to concentrate on the wish that the intelligence in question is connected to that particular volt and that it will bring about by it the desired causes in the Akasha-world, and with them the desired effects. // Franz Bardon, The Practice of Magical Evocation
Conductive sigils — i.e. sigils that pass an electric current — offer many possible uses in multimedia rituals, both mechanically as switches etc., and sympathetically to add or combine some magical quality to/with an electrical action. E.g., we could use a conductive rune as a switch to turn on an engine (like the Rune Priests of the Adeptus Mechanicus). Sigils can be drawn with conductive inks on just about any surface including skin. 3D sigils may be sculpted from wire or other conductive materials. Sigils of varying resistances could initiate various actions depending on which sigil is selected.
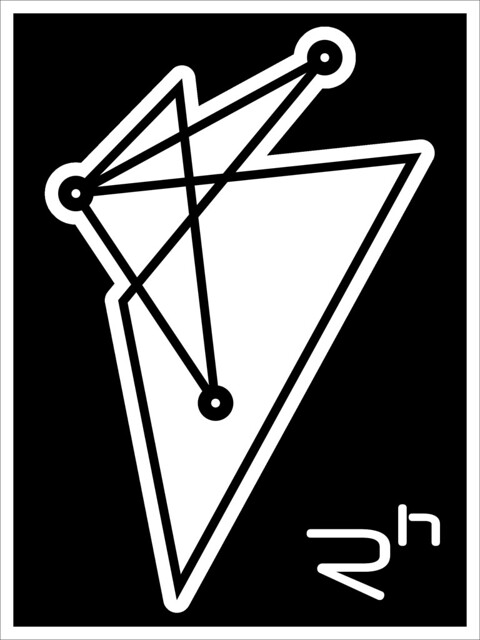
Here is an example of a conductive sigil, which I made using the same tech for making printed circuit boards:
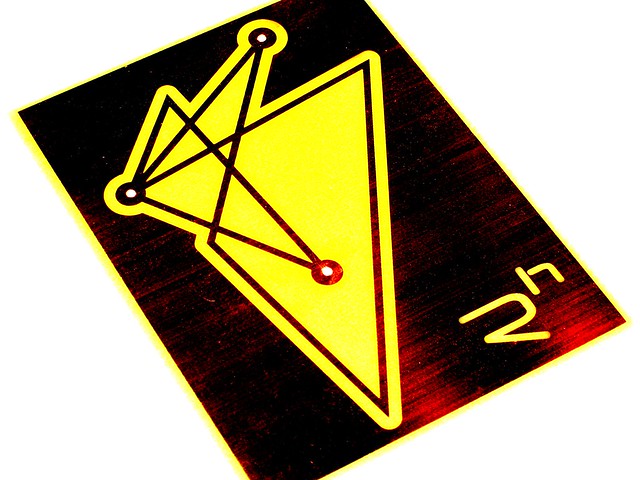
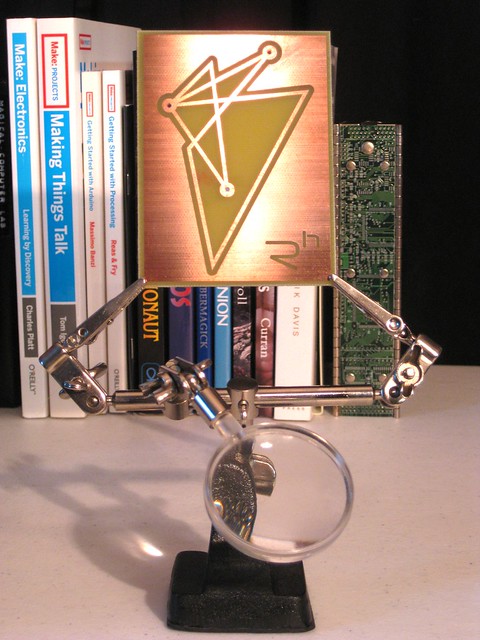
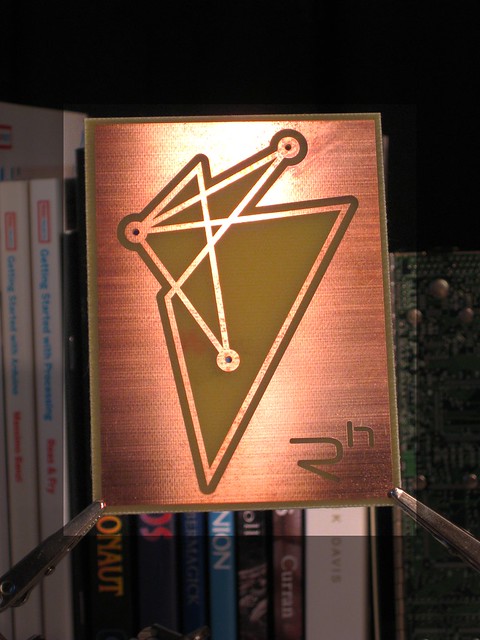

I first drew the sigil using Inkscape and GIMP, then laser-printed it (600dpi) to a transparency that I used to transfer the image to a photosensitive circuit board, which I then developed and etched (the circuit board, developer, and etch solution are available as a kit from Jameco). You can also just draw a sigil on a blank board, using a black Sharpie, and then etch that. The process may be as elaborate (consecrate the materials, employ them during appropriate hours, chant while etching, etc.) or simple as you care for.
To “charge” the sigil (no pun intended), I used Processing to play an appropriate song, and Arduino to send a voltage through the sigil, proportional to the varying amplitude of the song. Here are code examples for each application:
/**
 * Charge Sigil (Processing)
 * Joshua Madara
 * oneirodynesystems.com
 *
 * Parts of this code were taken from
 * Joshua Noble, _Programming Interactivity_, p.203
*/

import ddf.minim.*;
import processing.serial.*;

AudioPlayer mySong;
Minim minim;
Serial myPort;
int message = 0; // Holds the voltage value we'll send to Arduino

void setup(){
  size(600, 400);
  minim = new Minim(this);
  myPort = new Serial(this, Serial.list()[0], 9600);
  mySong = minim.loadFile("song_title.mp3");
}

void draw() {
  fill(0x000000, 30);
  rect(0, 0, width, height);
  stroke(255);
  noFill();
  // Load buffer for mySong into array mix
  float[] mix = mySong.mix.toArray();
  // Draw waveform across screen
  for(int i = 0; i < mySong.bufferSize() - 1; i++) {
    ellipse(i * 4, 200 + mix[i]*100, 5, 5);
  }
  // Play mySong
  mySong.play();
  // Map first value of array mix to
  // (rounded, integer) value between 0 and 255
  // that corresponds to 0 to 5 volts in Arduino
  // and set message to it
  message = int(round(map(mix[1], -1, 1, 0, 255)));
  // Send message to Arduino
  myPort.write(message);
  // println(message); // Uncomment to monitor message in Processing
}

// Stop and close minim
void stop() {
  mySong.close();
  minim.stop();
  super.stop();
}

/**
 * Charge Sigil (Arduino)
 * Joshua Madara
 * oneirodynesystems.com
*/

// Define variables for incoming message and output pin
int message = 0;
int outPin = 10;

void setup() {
  // Initiate serial connection
  Serial.begin(9600);
}

void loop() {
  if(Serial.available() > 0) {
    // Read message (0 to 255) from Processing, then...
    message = Serial.read();
    // ...set pin 10 to corresponding voltage (0 to 5 volts)
    analogWrite(outPin, message);
  }
}
To “evoke the spirit” of the sigil, I connect it in series with whatever ritual artifact(s) I am working with. E.g., a Scratch project might include the following script (assuming that the appropriate two wire pads on the sigil are connected to the Resistance-A input of the PicoBoard):

The “conditional stuff” could be any number of program blocks that manipulate graphics, play sounds, message other sprites to act, etc.
Here is a great video showing you how to etch using the same products as I did: